Introduction
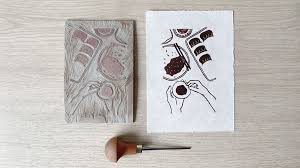
Lino printing, or linocut, is a captivating form of printmaking that combines artistry with craftsmanship. Known for its bold lines and striking contrasts, this technique has remained a popular medium for artists across the globe. From its origins in the early 20th century to its contemporary applications, lino printing continues to inspire both novice and seasoned artists. This article explores the history, materials, techniques, and creative potential of lino printing, providing a comprehensive guide to understanding and practicing this unique art form.
The Origins of Lino Printing
The Birth of Linoleum
The story of lino printing begins with the invention of linoleum in 1860 by Frederick Walton. Originally developed as a flooring material, linoleum was made from linseed oil, cork dust, and wood flour, creating a durable, flexible surface. Its smooth, slightly textured surface soon caught the attention of artists and craftsmen who saw its potential for printmaking. The material was relatively easy to cut and offered a clean, even surface, making it an ideal medium for carving.
Early Adoption by Artists
In the early 20th century, linoleum’s versatility was embraced by artists seeking a new medium for printmaking. The technique gained prominence in the 1920s and 1930s, particularly within the German Expressionist movement. Artists like Ernst Ludwig Kirchner and the members of Die Brücke (The Bridge) collective exploited linocut’s potential for dramatic, emotive imagery. The medium’s ability to produce bold, graphic prints quickly made it a favorite among artists who valued its expressive power and simplicity.
The Materials and Tools of Lino Printing
Choosing the Right Linoleum
Linoleum blocks are the foundation of lino printing. They come in various thicknesses and qualities, with the most common type being a combination of linseed oil, cork dust, and wood flour. These blocks are available in different sizes, allowing artists to choose the best fit for their projects. Thicker blocks are more durable, making them ideal for multiple prints, while thinner blocks are easier to handle for detailed work.
Essential Carving Tools
Carving tools are crucial for creating the design on the linoleum block. These tools come in various shapes and sizes, each designed for specific carving techniques. Common tools include:
- V-Gouges: Ideal for creating fine lines and detailed patterns.
- U-Gouges: Useful for cutting wider lines and creating texture.
- Chisels: Perfect for removing larger areas of linoleum.
These tools are often sold in sets, allowing artists to experiment with different styles and techniques.
Inks and Brayers
The choice of ink can significantly impact the final print. Printmaking inks are available in oil-based and water-based varieties. Oil-based inks are known for their rich color and durability, while water-based inks are easier to clean and more environmentally friendly. Brayers, or rollers, are used to apply the ink evenly to the linoleum block. They come in various sizes, with larger brayers suitable for covering larger blocks and smaller ones ideal for intricate details.
Paper and Presses
Selecting the right paper is essential for achieving the desired print quality. High-quality, absorbent paper such as Somerset, Fabriano, or Japanese rice paper is commonly used in lino printing. These papers can handle the ink’s weight and texture, capturing fine details and vibrant colors.
Printing presses are not always necessary for lino printing, especially for beginners. A simple handheld baren, a flat, round tool, can be used to apply pressure to the paper, ensuring even contact with the inked block. For those with access to a press, it provides consistent pressure, making it easier to achieve professional-quality prints.
The Step-by-Step Process of Lino Printing
Designing the Image
The first step in lino printing is to create the design. Artists often start with a pencil sketch on paper, refining the composition before transferring it to the linoleum block. To transfer the design, artists can use carbon paper or trace the image directly onto the block. It’s essential to remember that the print will be a mirror image of the original design, so any text or symmetrical elements should be reversed.
Carving the Linoleum
With the design transferred, the next step is carving the linoleum. Using the carving tools, start by outlining the main shapes and details. Work carefully, applying steady pressure to avoid cutting too deeply. Begin with larger gouges for broad areas and switch to finer tools for intricate details. It’s crucial to take your time and enjoy the process, as carving is both a meditative and creative experience.
Inking the Block
Once the design is carved, it’s time to ink the block. Squeeze a small amount of ink onto a glass or acrylic surface and roll it out with the brayer until it’s evenly spread. Roll the brayer over the linoleum block, covering all the raised areas with a thin, even layer of ink. Avoid over-inking, as this can result in smudging and loss of detail.
Printing the Image
Place a sheet of paper over the inked linoleum block. If using a printing press, carefully align the paper and place it on the press bed. For hand-printing, position the paper on the block and use the baren to apply even pressure across the back of the paper. Rub firmly and evenly, ensuring that the entire surface of the paper makes contact with the block. Carefully lift the paper to reveal the print, which may take a few moments to dry.
Also Read : VyvyManga
Conclusion
Lino printing is a timeless art form that bridges tradition and innovation. From its humble beginnings as a floor covering to its status as a celebrated medium in contemporary art, lino printing continues to captivate artists with its simplicity, expressiveness, and versatility. Whether you are an experienced artist or a curious beginner, lino printing offers a rewarding journey of discovery, creativity, and self-expression. So, gather your tools, unleash your imagination, and immerse yourself in the fascinating world of lino printing. The possibilities are limitless, and the potential for creativity is boundless.


